September 9, 2021
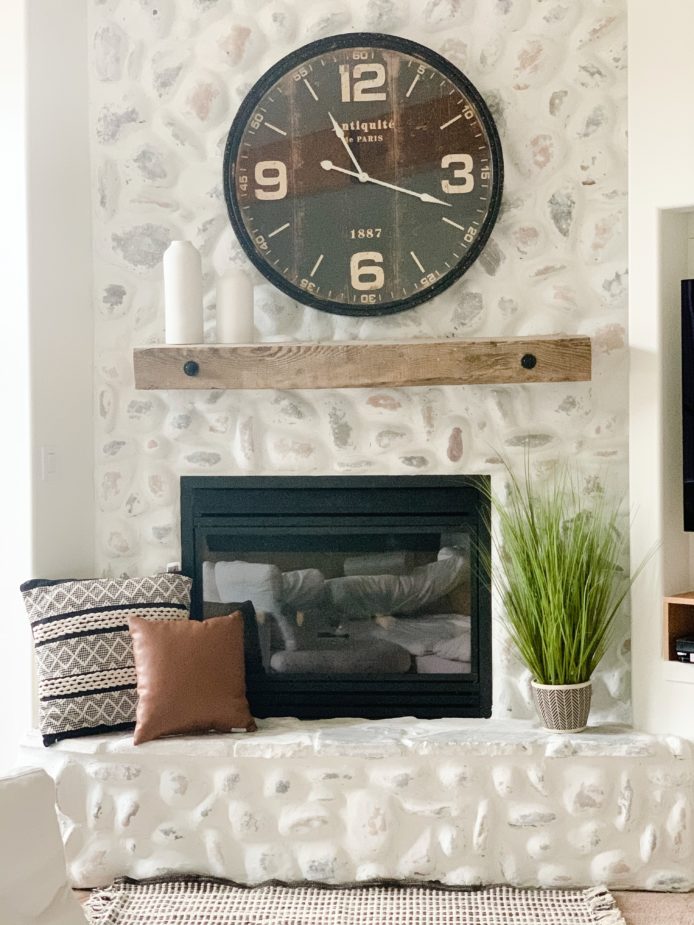
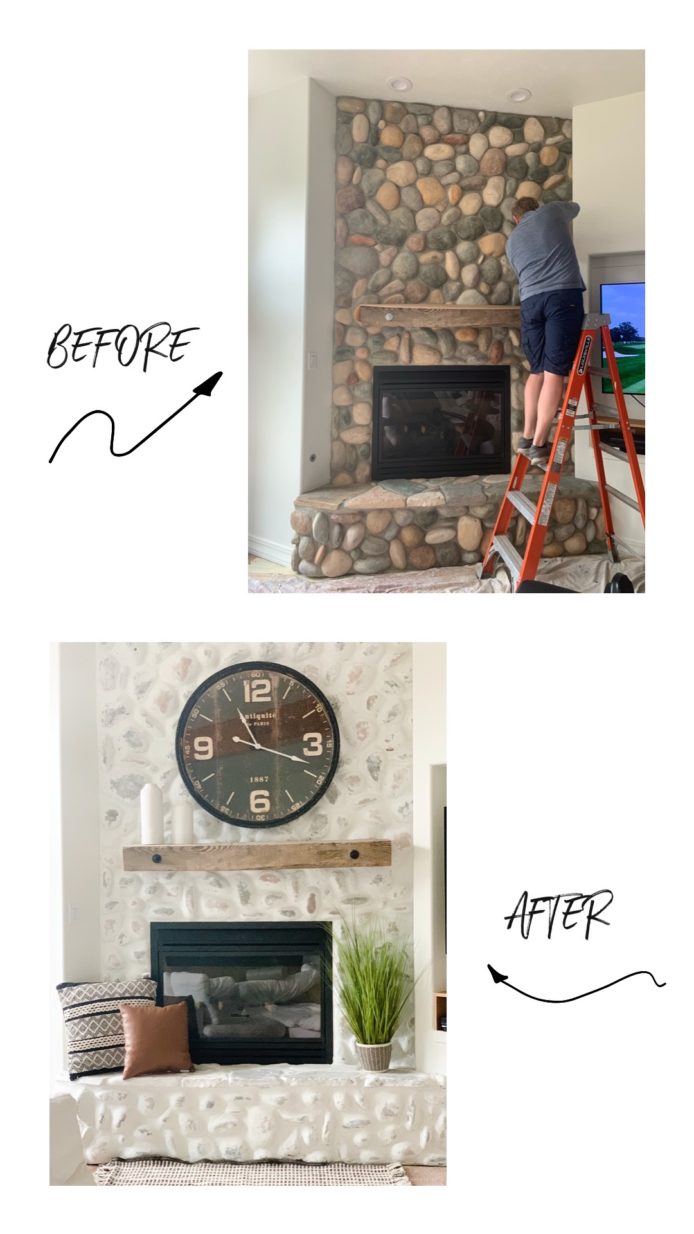
When we moved into our current house, I fell in love with the giant fireplace. What I didn’t love, however, was the color of the river rock.
I kept thinking I would get used to it. I didn’t. In fact, the longer we lived in the space, the more I disliked the rock. We updated the kitchen adjacent to the great room, and the bright, light tones clashed with the heaviness of the brown rock.
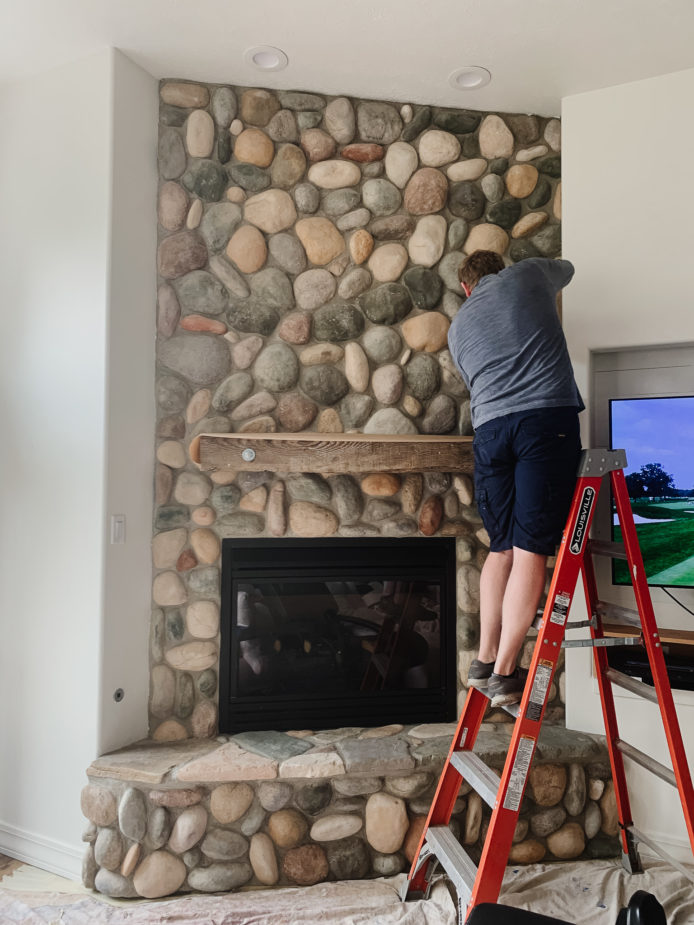
However, it’s really expensive to change stone. First it must be removed, then replaced. Financially that is a big commitment. So I began looking for other options.
I knew I’d found the answer when I saw pictures of Emily Henderson’s fireplace transformation using a German Smear. Some spell it smear, some schmear. I’ll stick with smear for simplicity!
The German Smear technique is similar to whitewashing bricks, but instead of simply diluting latex paint, the brick is covered with wet mortar. It mimics the look of irregular stones and heavy mortar joints like the ones found in old European villages on historic cottages and castles.
I asked some friends if I should try to German Smear our fireplace. They said no. I asked my husband. He said no. In general, people are afraid to mess with stone, especially when it’s front and center in a room.
I told my husband I would try it on the downstairs fireplace for a “test run” before we did the one upstairs. He agreed to that arrangement, so I got going before he changed his mind!
Mike, our incredible handyman / contractor for all things, agreed to help me. This proved to be key. Two people on this job is a must. We worked in tandem on sections so the mortar would not harden.
How to German Smear
Supplies Needed
- Mortar
- 5 gallon plastic bucket
- Grout sponges
- Mixing attachment for drills
- Rubber gloves
- Heavy duty piping bags (I only found these at Lowes)
- Painter’s tape
- Painter’s paper (for covering walls)
- Drop cloth
- Trowel
- A bucket for water
- A ladder
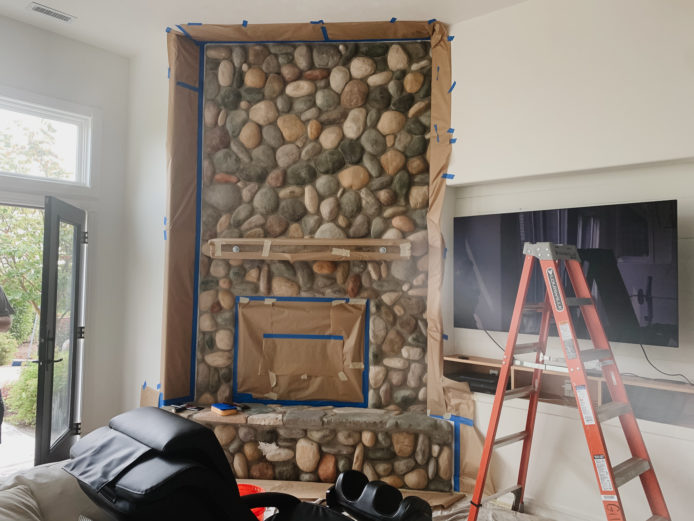
Prepare your rock by taping the edges well.
You will need painter’s tape and paper to protect the walls around your fireplace. Also lay down a drop cloth on the floor in case any mortar falls, and tape around the fireplace unit.
Mix the mortar and water in a large plastic bucket
Mix the mortar and water in the 5 gallon bucket with the drill attachment. Let sit for ten minutes, then mix again. Mixing it again will help prevent it from hardening as you work with it.
Fill the mortar into heavy duty piping bags
Using a trowel, place the mortar into heavy duty piping bags. Pipe the mortar in between the rock. Using the grout sponge, press the mortar into the cracks, and then wipe the mortar across the stone. Doing this in an uneven pattern makes it feel more natural.
Using a fresh sponge in clean water, wipe off the tip of the rock to reveal any amount of color you wish. Again, an uneven pattern is great.
Finishing touches
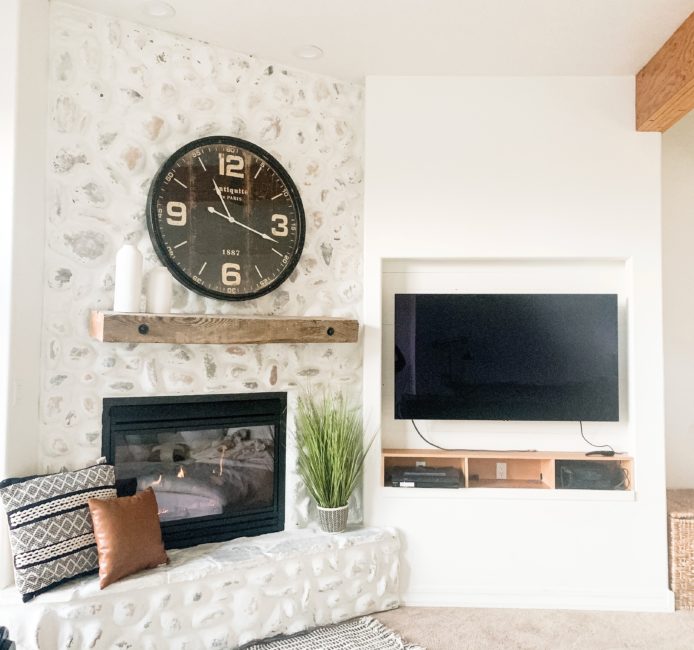
When we were through, we went back and wiped more mortar off the face of the stones to reveal a bit more color. Then we removed the painter’s tape and let it dry.
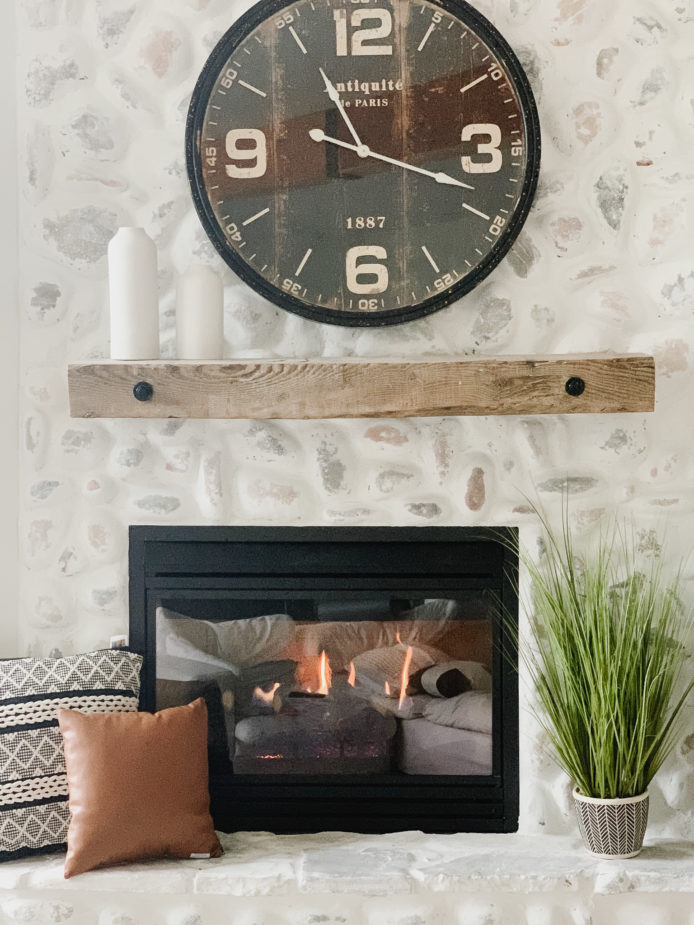
This diy change is a huge improvement. We like the German Smear because it makes the rock feel more flush and less rounded.
This project was fairly time intensive. For that reason, we decided to do a white wash on the upstairs instead to see if we could get a similar look without the labor of the Smear. You can check out our process and tell us what you think!
I’d love to hear – what project are you doing and how are you using the German Smear technique?
Or Pin for Later!
Hi, Krista — Did you ever do the whitewash for your upstairs fireplace? Or did you “german schmear” again? We just did our less prominent one and we are trying to figure out if we want to do it to the living room or do something different.
Hi Suzanne – we did do the whitewash – twice. It was too big to German Schmear or I would have done that!
Question: do you know if it would be bad to smear a fireplace in sections? I have a very large stone fireplace and want to DIY but don’t think I could knock out in a single day.
Yes you could for sure do that. The only pain is the mixing of the mortar. But if you are willing…. 🙂 I’d love to know how your project goes!
I guess it all depends on the look you want.
Personally I like the river rock better. The smear looks like a low budget fix.
Hi Darcy! Well ultimately design is personal. Some like one thing, and others like something different. I will say that in person it does not look low budget. I’m pretty in tune with what looks good and what looks tacky and this looks beautiful. It’s definitely not for everyone, but I LOVE IT! It really modernizes the home. Thanks for weighing in!
Hello, what wall paint did you use? Wondering what will go well with the fireplace colors.
Hi Jessica – meaning what color? We used SW Alabaster.
What type of mortar did you use? I’m having trouble finding mortar in bright white.
Hi Allison – Home Depot should have it!
I love it! I was wondering though if this can be done on faux stone that juts out a several inches in some places?
Hi Daisy – I would think so. If it’s strong enough to hold the plaster, but I would think it would be. Good luck!
Your fireplace turned out so well. My fireplace has the same exact look that yours did. How many 50 lb bags of mortar did you need?
I think 2 but I could be wrong – It’s been a while now!
Comments